Moving a vending machine is a two-person job at minimum, and often a three-person one. Most standard snack and drink combo machines weigh between 200 and 400 kg, and their center of gravity shifts when they’re not fully upright, making an apparently simple move far more hazardous than it looks. Getting the process right protects the machine, the location, and anyone helping.
This guide covers preparation, equipment, step-by-step transport, and what to check once the machine is back in place.
Why Operators Relocate Vending Machines
Before getting into the how, it’s worth understanding the when. Most machine moves fall into one of three categories:
- Location underperformance. Sales data shows the site isn’t generating enough volume to justify the placement. The Neuroshop guide on using vending machine sales data to make business decisions covers how to spot this early before committing to a move.
- Site access changes. The location is being renovated, the lease has ended, or the property manager has asked for the machine to be removed.
- Fleet expansion and rebalancing. A better site has opened up, and the machine currently in a low-traffic location would perform better elsewhere.
Knowing the reason for the move usually clarifies how urgent it is and how much disruption to the current site is acceptable.
Equipment You Need Before You Start
Attempting to move a vending machine without the right equipment causes most of the injuries and damage operators report. Collect everything before the machine is touched.
| Equipment | Why You Need It |
|---|---|
| Heavy-duty appliance dolly (rated 300+ kg) | Core transport tool; standard dollies bend or tip under vending machine weight |
| Moving straps or ratchet straps | Secures the machine to the dolly and prevents shifting in the vehicle |
| Corner guards or moving blankets | Protects the machine finish and stops it scratching door frames |
| Flat plank or door mat | Bridges gaps between surfaces, such as a step into a loading dock |
| Vehicle with a lift gate | Essential for machines over 200 kg; manual loading causes back injuries |
| Non-slip gloves | Improves grip on smooth surfaces and machine edges |
If you don’t own a heavy-duty appliance dolly, renting one costs far less than repairing a machine dropped during an improvised move.
How to Move a Vending Machine: Step by Step
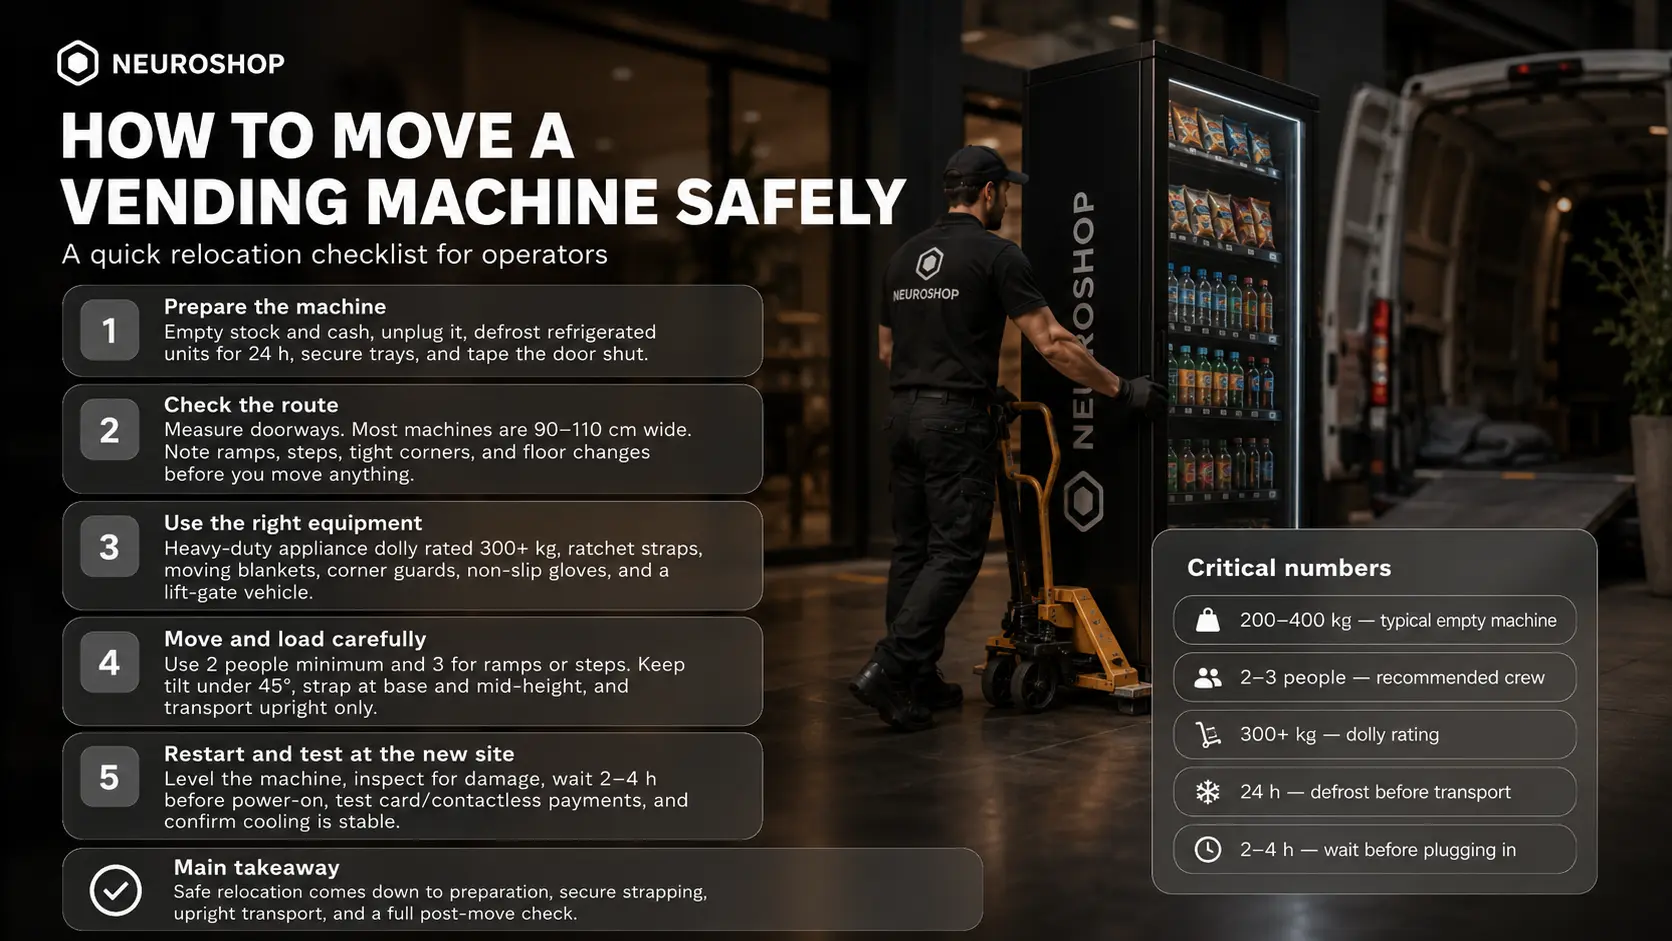
The five steps below follow the same sequence every time, regardless of machine type. Skipping any of them is where most transport damage occurs.
Step 1: Prepare the Machine
Before anything moves:
- Empty the machine completely. Remove all products and cash. A fully stocked machine can weigh 100 kg more than an empty one.
- Unplug from power. Allow refrigerated units to defrost for at least 24 hours before transport to prevent compressor damage.
- Secure internal components. Tape any loose trays, shelves, or payment modules to prevent rattling damage in transit.
- Lock or tape the door shut. Doors swinging open during a move are a common cause of damage to both the machine and nearby walls.
Step 2: Assess the Route
Walk the entire route from current position to vehicle before moving anything. Note:
- Door widths. Standard vending machines are 90 to 110 cm wide; check every doorway.
- Steps or ramps. Each step requires a controlled tilt, which needs extra hands.
- Floor surface changes. Moving from carpet to tile changes the resistance significantly.
- Tight corners. Measure clearances; machines don’t bend.
Step 3: Tilt, Position, and Strap
- Tilt the machine backward slightly with two people holding it stable.
- Slide the dolly blade fully under the machine base.
- Lower the machine onto the dolly and confirm it’s fully supported.
- Apply two straps: one at the base, one at mid-height.
- Test by gently shifting weight before committing to movement.
Operating food vending machines across Europe?
Neuroshop's AI vending machines produce the compliance records inspectors require.
Step 4: Navigate to the Vehicle
Move slowly and keep the machine tilted at no more than 45 degrees. On ramps or steps:
- Go up ramps forwards, with the machine going first and the dolly following
- Go down ramps backwards, with the dolly going first and the machine following
- Never let the machine tilt past the point where two people can easily control it
At steps, one person controls the dolly handles while a second person stabilises the machine from the front. Never attempt a step alone.
Step 5: Load and Secure in the Vehicle
- Machines must travel upright. Laying a vending machine on its side risks compressor oil migrating into the cylinders, which can cause permanent damage to refrigerated units.
- Back the machine into the vehicle and secure it against the vehicle wall with straps.
- Use corner guards between the machine and any other cargo.
- If the machine will be refrigerated after transport, allow it to stand upright for at least 2 to 4 hours before plugging in.
Special Considerations for Smart Micromarkets
Moving a connected micromarket or Neuroshop AI micromarket involves a few additional steps beyond standard machine relocation. The physical move follows the same process as any other unit, but the software layer needs its own checklist before and after.
Before disconnecting:
- Log into the dashboard and note current stock counts for each SKU
- Flag the site as temporarily offline so the system doesn’t generate false low-stock alerts
- Document any active promotions or pricing configurations
During the move:
- Treat camera and sensor components as fragile; pack them separately if they can be removed
- Keep all cable connections labelled before disconnecting
After installation at the new site:
- Reconnect and run a system check before opening to customers
- Update the location data in the fleet dashboard
- Confirm cashless payment terminals connect to the new network before the first transaction
For operators managing several machines across multiple sites, the decision of which machine to move where is itself a data question. Neuroshop’s telemetry platform shows sales performance by location, making it straightforward to identify which site would benefit most from additional or upgraded equipment.
After the Move: What to Check
Once the machine is installed at the new location, work through this checklist before switching it back on:
- Level the machine. Use the adjustable feet to ensure it sits flat. An unlevel machine can cause dispensing errors and door alignment problems.
- Check for damage from transport. Inspect the exterior, door seals, and payment terminal panel.
- Test all payment methods. Run a test transaction with card and contactless before restocking.
- Check refrigeration temperature. Allow 2 to 4 hours after plugging in before confirming the cooling is stable.
- Update location records. If the machine is operating under a location agreement, notify the new site manager and update any compliance documentation.
New operators unfamiliar with location agreement requirements should also review the Neuroshop guide to vending machine licensing in Europe, which covers documentation requirements by country, including what changes when a machine moves to a new site.
What Can Go Wrong: Practical Problems and How to Fix Them
Most transport problems are predictable. The five issues below cover the majority of what operators report after a move, along with the specific fix for each one.
Compressor damage after transport
- What happens: Refrigerated units transported on their side or tilted at steep angles allow compressor oil to migrate into the refrigerant lines. When the machine is switched on, oil in the lines causes the compressor to seize or run abnormally.
- How to avoid it: Transport upright at all times. If a brief tilt is unavoidable, keep it shallow and temporary. After transport, leave the machine standing unplugged for at least 2 to 4 hours to allow oil to drain back before powering on.
- If it happens anyway: Do not try to run the machine to “test it.” Switch off, leave upright overnight, and power on the next day. If the compressor still sounds abnormal or fails to cool, call a refrigeration technician before the unit develops further damage.
Door frame and floor damage at new site
- What happens: Operators measure the machine but forget to measure doorways or corners, and the machine scrapes walls or catches door frames during installation.
- How to avoid it: Measure every doorway and corridor on the route before starting. Standard vending machines are 90 to 110 cm wide; narrow commercial doorways can be as tight as 80 cm. Corner guards on the machine and door frame protectors on the building cost very little.
- If it happens anyway: Note all damage immediately with photos and document whether it was pre-existing before reporting it to the site manager.
Payment terminal loses network connection after relocation
- What happens: The machine’s cashless payment module was configured to a specific Wi-Fi network or SIM carrier coverage area. After moving, the connection either fails or needs to be reconfigured.
- How to avoid it: Before the move, check whether the new location has the same network infrastructure or suitable mobile coverage. Neuroshop’s connected equipment uses the same dashboard after relocation, but network access at the new site needs to be confirmed in advance.
- If it happens anyway: Contact the payment processor to reconfigure the terminal for the new network rather than attempting to reset it manually, which can wipe stored transaction data.
Machine out of level at new site, causing dispensing errors
- What happens: Vending machines rely on gravity for product delivery. An unlevel floor causes items to fall short of the delivery chute or jam in their slots, leading to failed vends and customer complaints.
- How to avoid it: Check floor levelness at the new site before installation. All Neuroshop machines have adjustable feet. Set the machine to a very slight backward tilt (a few millimetres) so products fall cleanly into the delivery tray.
- If it happens anyway: Use a spirit level and adjust each foot individually until the machine sits correctly. This takes five minutes and prevents most dispensing complaints.
Incorrect power supply at new location
- What happens: European vending machines operate on 230V single-phase supply. Some older industrial or warehouse buildings have non-standard wiring, or the nearest outlet is on a circuit shared with heavy equipment that causes voltage fluctuations.
- How to avoid it: Confirm the power supply at the new site before installation. Refrigerated units draw more current on startup than during normal operation; the circuit needs to handle the peak load comfortably.
- If it happens anyway: Use a surge protector rated for the machine’s power draw and arrange for an electrician to check the circuit before operating the machine long-term.
How Neuroshop Supports Installation and Relocation
A well-planned installation avoids most of the problems above before they start. Here’s what that looks like in practice with Neuroshop equipment.
Moving a machine is easier when the equipment is designed for fleet management from the outset. Neuroshop’s fridge vending machines and AI micromarkets are built around remote monitoring and centralised fleet dashboards, which means a relocated unit reconnects to the same data layer at the new site without needing manual reconfiguration at each endpoint.
For operators planning their first installation or considering a site change, Neuroshop’s team is available to help with:
- Placement decisions and site assessment
- Power and connectivity requirements at the new location
- Practical installation steps for each equipment type
- Dashboard setup and network configuration after relocation
Getting the installation right the first time saves far more time than diagnosing problems after the machine has been running for a week.
Operators running into site selection questions alongside relocation decisions should also review the Neuroshop guide on common vending machine business mistakes, which covers both installation and location errors worth avoiding from day one.
Operating food vending machines across Europe?
Neuroshop's AI vending machines produce the compliance records inspectors require.
Conclusion
Moving a vending machine safely comes down to preparation: the right dolly, a clear route, secure strapping, and at least two people doing the work. Refrigerated units need extra time to defrost before transport and to stabilise after. Smart micromarkets need a brief software checklist on top of the physical move. Done correctly, a relocation is straightforward. If you’re planning a move and want advice on installation or equipment options for the new site, Neuroshop is happy to help.
Frequently Asked Questions
How heavy is a vending machine?
Most standard snack and drink combo machines weigh between 200 and 400 kg when empty. A fully stocked machine can weigh significantly more, which is why a heavy-duty appliance dolly rated for the actual weight is essential before moving.
Can you move a vending machine on its side?
No. Transporting a refrigerated vending machine on its side risks compressor oil migrating into the cylinders, which can cause permanent damage. Always transport upright and allow the machine to stand for 2 to 4 hours before plugging in after transport.
How many people does it take to move a vending machine?
Two people is the minimum for a flat surface with no obstacles. Three people is strongly recommended for routes involving steps, ramps, or tight corners, where one person needs to stabilise the front of the machine while two handle the dolly.
Do I need special equipment to move a vending machine?
Yes. A standard furniture dolly is not strong enough. You need a heavy-duty appliance dolly rated for at least 300 kg, ratchet straps, moving blankets, and a vehicle with a lift gate for machines over 200 kg.
What should I check after installing a vending machine at a new location?
Level the machine using the adjustable feet, inspect for transport damage, test all payment methods before restocking, confirm refrigeration is stable after 2 to 4 hours, and update any location records or compliance documentation for the new site.

